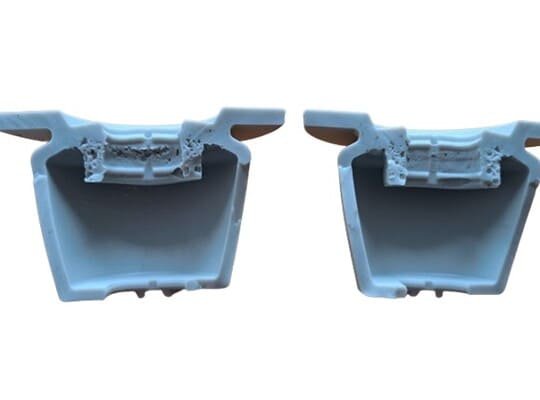
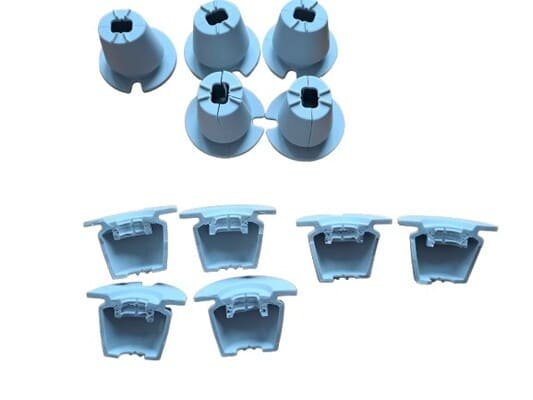
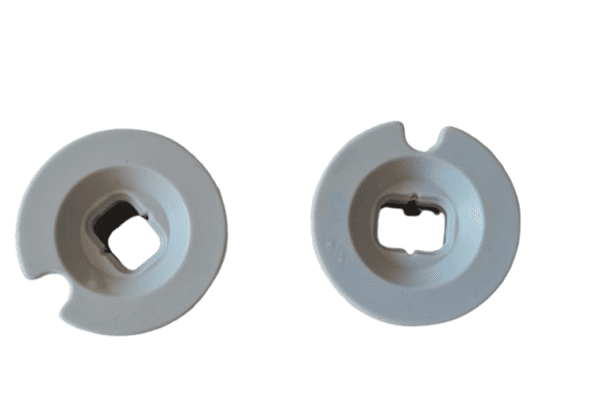
I know the sinking feeling when you cut a rubber part for inspection and see an ugly void staring back at you from the middle.
Voids inside rubber parts usually come from trapped air, moisture, poor flow, wrong cure profile, or volatile contamination. The root cause is a mix of part design, compound design, and molding process settings.

When I run projects with new molds in my own factory, I never treat voids as simple “bubbles”. I look at the pattern, the location, and the process history. Then the real cause becomes much easier to see and fix.
What kinds of voids do I normally see inside rubber parts?
Many people call every defect a “bubble”, but different void patterns tell very different stories about the root cause.
You usually see three main types of voids: trapped air pockets, shrinkage voids from poor packing, and random bubbles from moisture or volatiles. Each type has its own typical location and shape.
I like to classify voids before I touch any machine settings. This simple step already filters out a lot of noise and stops people from changing ten things at once.
Common void types and what they mean
When I cut cross-sections1 of suspect parts in our lab, I often see repeating patterns. These patterns are my first clues.
1. Trapped air pockets2
These look like smooth, round or slightly stretched cavities. They often sit near the last area to fill in the cavity, or near thick sections where air can get trapped.
✅ They usually point to poor venting3, low clamp tonnage, or bad pre-form design in compression molding4.
2. Shrinkage voids5
These voids often sit near the thickest part of the section and may not be round. They can look like a sunken core or a star-shaped gap near the center.
✅ They usually indicate that the rubber flowed in, started to cure, and then shrank without enough extra material to “feed” that area.
3. Random gas bubbles6
These voids look scattered. They might be small, irregular, and not tied to one flow pattern.
✅ They often come from moisture in the compound, dirty molds, or decomposing additives that release gas during cure.
I sometimes use a simple table with my team to speed up diagnosis:
| Observation 🧐 | Likely void type | First suspects to check |
|---|---|---|
| One large bubble near last fill | Trapped air | Venting, pre-form layout, fill balance |
| Void at thick core, tool looks OK | Shrinkage | Packing, cure profile, compound shrinkage |
| Many small bubbles everywhere | Gas from moisture | Compound drying, storage, contamination, cure speed |
When you see voids in your own parts, try to match what you see to this simple map first. Then your next actions become much more focused.
How does the molding process7 create voids inside rubber parts?
I often see teams tweak pressure or temperature randomly when voids appear, and sometimes the parts even get worse. The process has a clear logic, and voids follow that logic.
The molding process creates voids when the cavity does not vent, the rubber does not pack and cure evenly, or the press cycle pushes air and volatiles into thick sections instead of out through vents.

When I troubleshoot at the press, I always connect voids to the actual process curve: how the press closes, how pressure builds, and how long the part stays under heat and pressure.
Where process parameters8 go wrong
Rubber molding looks simple from the outside, but the press recipe is a dance between flow, pressure, and cure.
Compression and transfer molding
In compression and transfer molding, trapped air is a classic problem. If the pre-form is too big, too small, or in the wrong shape, it can block vents or leave empty pockets. When the press closes too fast, air has no time to escape.
🛠️ A slower closing profile or a short “breathe” step (close, open slightly, then close again) sometimes lets air out before full pressure.
If cure starts too early because the mold is very hot or the compound is very “fast”, the rubber begins to stiffen before you reach full packing pressure. In that case, the outside skin cures, the core shrinks, and a void opens up. Here, I may reduce the mold temperature slightly or extend the cure time, so pressure and cure line up better.
Injection molding
In injection molding9, voids often show up at the last fill areas or deep behind ribs. Poor runner or gate design can cause jetting and trapped air. Incorrect injection speed can also drag air into corners.
I always review the fill pattern first. If the part fills from one side and has long, thin flow paths, the last area to fill is a natural risk zone for voids. Better gate location, balanced runners, and proper venting3 near the end of fill are key.
Simple process checklist for void reduction
| Process area | Key setting or factor | Effect on voids |
|---|---|---|
| Mold closing | Speed and “breathe” steps | Controls how much air escapes |
| Pre-form design | Shape, size, placement | Affects air traps and filling consistency |
| Pressure build-up | Timing vs. cure start | Determines if the core can pack properly |
| Cure time and temp | Matching cure curve to flow | Reduces early skin cure and shrinkage voids |
| Venting | Vent depth, location, cleanliness | Lets air and volatiles leave, not stay inside |
When I make changes, I change one or two items at a time and keep clear notes. This way, I can see which adjustment really helps and avoid chasing ghosts.
If you want a deeper look at basic molding process7 setup, you can also link this topic to a more general guide like “how to set up rubber molding parameters for consistent quality” on your own blog, so readers can move from defects to prevention.
Can compound design and raw materials cause internal voids?
Sometimes the process looks fine, but voids still pop up. In those cases, I always turn back to the compound and raw material handling.
Compound design and material handling can cause voids when moisture, incompatible additives, or unstable blowing reactions create gas during cure. Even the wrong hardness or filler level can make shrinkage voids worse.
I have seen projects where three different molders had the same void problem with the same compound. That is when I know the issue starts in the compound, not in the press.
How the recipe and mixing affect voids
Rubber compounds are not just polymer and sulfur. They include fillers, oils, accelerators, and sometimes blowing agents or specialty additives. These all affect gas generation and shrinkage.
Moisture and contamination
If the compound absorbs moisture during storage, or if we mix moist filler into it, that water can turn into steam during cure. The result is small, scattered bubbles, often near the hottest zones.
✅ I reduce this risk by storing compounds in controlled conditions10 and by using dry fillers. For sensitive projects, I limit long open times at the press, so the compound does not sit in humid air for hours.
Volatile additives and overloading
Excess oil or low-boiling plasticizers can vaporize under heat and create gas pockets. I once saw a case where a customer pushed for a very soft compound and requested a lot of oil. The parts felt great, but they started to show internal bubbles at higher cure temperatures. We had to re-balance the formulation to keep softness while reducing volatile load.
Shrinkage behavior and hardness
Different compounds shrink in different ways. High filler loading or very high hardness levels can increase internal stress and shrinkage. If the mold does not give enough extra rubber to feed the core during cure, the material can pull away from the center and leave a void.
Here is how I summarize compound-related risks:
| Compound factor 🔍 | Possible void effect | Typical countermeasure |
|---|---|---|
| Moisture in compound | Many small bubbles | Better storage, dry fillers, shorter open time |
| Excess plasticizer | Local gas pockets during cure | Adjust oil level, choose higher-boiling oils |
| High filler loading | Strong shrinkage, denser voids in core | Tune filler level and cure curve |
| Blowing agents | Controlled cells or accidental voids | Match cure schedule to blowing behavior |
If I suspect a compound issue, I often ask our lab to press small test sheets at different temperatures and times. We then cut them and look for bubbles. This simple test isolates the material from the mold and press, and it often confirms if the recipe itself generates voids.
On your website, this section can link to a more detailed article such as “rubber compound design11 basics for industrial seals”, so purchasing officers and engineers can understand why some materials are more sensitive than others.
How can I prevent voids in future production runs?
Most teams focus on sorting out bad parts once a void problem appears. I prefer to design the whole system so that voids become rare, not normal.
You prevent voids by combining better part and mold design, clean and stable compounding, controlled molding parameters, and a simple inspection and feedback loop that catches issues before they scale.

When I work with long-term partners, we treat void prevention as a shared task. The designer, compounder, molder, and inspector all have a role.
A practical prevention roadmap
I like to build prevention into four pillars: design, material, process, and feedback.
1. Part and mold design
During the design stage, we try to avoid very thick cores without feed paths. We add proper radii instead of sharp corners. We plan vent locations near last-fill areas. For injection molds, we balance runners so the part does not fill from one corner only. Small changes here can reduce risk a lot.
2. Material and mixing
We define compound recipes that match the temperature and pressure profile of the planned process. We avoid unnecessary volatile content and keep moisture-sensitive fillers under control. We also set clear storage rules for mixed rubber. In my factory, we track batch age and keep compounds wrapped until use.
3. Process windows and work instructions
We do not run presses on “feel” alone. We define closing speed, pressure stages, cure time, and mold temperature in simple, clear instructions. We also specify a regular cleaning schedule for vents and cavities. When operators see voids, they do not guess. They check a short troubleshooting12 sheet that points them to likely causes in order.
4. Inspection, cutting plans, and feedback
For critical parts, we plan regular destructive tests. We cut parts on planned intervals and check cross-sections. We record void patterns and link them back to batch numbers and press records. This feedback closes the loop and allows us to adjust before customers see defects.
Here is a simple summary table you can adapt into an internal checklist or a downloadable PDF on your site:
| Pillar | Key actions ✅ | Outcome |
|---|---|---|
| Design | Avoid thick cores, add vents, use balanced gates | Less trapped air and shrinkage |
| Material | Control moisture, volatiles, filler levels13 | Less gas generation and internal stress |
| Process | Set closing profile, cure time, vent cleaning | Stable packing and cure, fewer surprises |
| Feedback | Plan cross-sections and record defects | Early detection and faster root-cause |
At Julong Rubber, I follow this roadmap when I develop and produce parts for HVAC, machinery, and other industrial systems. I discuss void risk with customers early, not only when something goes wrong. If you have drawings or defect photos you want to review, you can always reach me through www.rubberandseal.com or by email at info@rubberandseal.com. I am happy to look at your case and suggest both quick fixes and long-term prevention ideas.
Conclusion
Voids inside rubber parts come from a mix of design, material, and process issues; when you classify the voids and fix these three pillars, they become rare instead of a constant headache.
-
Learn how cross-sections can provide valuable insights into internal defects. ↩
-
Understanding trapped air pockets can help you identify and prevent common molding defects. ↩
-
Learn about venting to prevent air traps and improve part quality. ↩ ↩
-
Gain insights into compression molding to troubleshoot and optimize your production. ↩
-
Learn about shrinkage voids to improve your rubber molding process and reduce defects. ↩
-
Discover the causes of random gas bubbles to enhance the quality of your molded parts. ↩
-
Explore the molding process to understand how to prevent voids and improve part quality. ↩ ↩
-
Explore the importance of process parameters to enhance your molding outcomes. ↩
-
Learn about injection molding voids to enhance your manufacturing efficiency. ↩
-
Understanding controlled conditions can help maintain the quality of your rubber compounds. ↩
-
Understanding compound design is crucial for creating high-quality rubber products. ↩
-
Explore troubleshooting steps to quickly identify and resolve molding issues. ↩
-
Explore the impact of filler levels to optimize your rubber compound formulations. ↩


