I know how confusing rubber molding can seem at first, especially if you have never watched the process in person. Many buyers are surprised to learn how much detail goes into making even a simple rubber part.
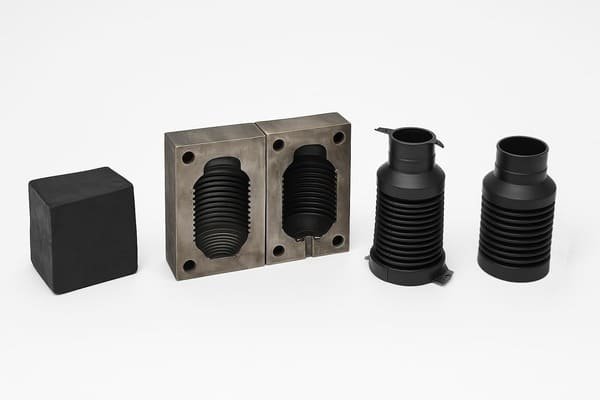
The rubber molding process involves placing uncured rubber into a mold, applying heat and pressure, allowing the rubber to cure (vulcanize), and then removing the finished, shaped part. This process creates parts like gaskets, seals, O-rings, and custom rubber components.

Understanding the exact steps can help you avoid mistakes and get better results, whether you need one custom gasket or thousands of precision-molded parts.
What are the main steps in the rubber molding process?
I often guide my customers through each stage so they know what to expect. Skipping any step can lead to defects or failed parts.
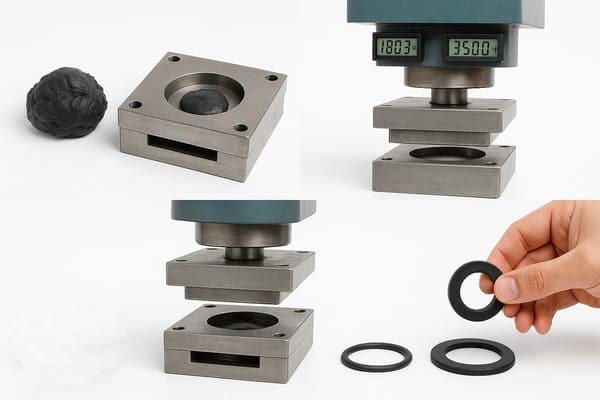
The main steps of rubber molding are: material selection and prep, loading the mold, applying heat and pressure, curing, demolding, and post-processing (like trimming and inspection).

Rubber Molding Step-by-Step Table
| Step | Description |
|---|---|
| 1. Material Prep | Select and prepare raw rubber compound (preform or sheet) |
| 2. Mold Loading | Place uncured rubber into the heated mold cavity |
| 3. Heating/Pressurizing | Close mold, apply set temperature and pressure |
| 4. Curing/Vulcanizing1 | Rubber undergoes chemical crosslinking (vulcanization) |
| 5. Demolding2 | Open mold, remove the fully cured and shaped part |
| 6. Trimming3/Finishing | Remove excess material (flash), inspect, and test |
I always recommend verifying curing times and temperatures with your supplier, as each rubber compound can be different.
What are the main types of rubber molding processes4?
Not all rubber parts are molded the same way. I help my customers pick the process that matches their design, quantity, and material needs.
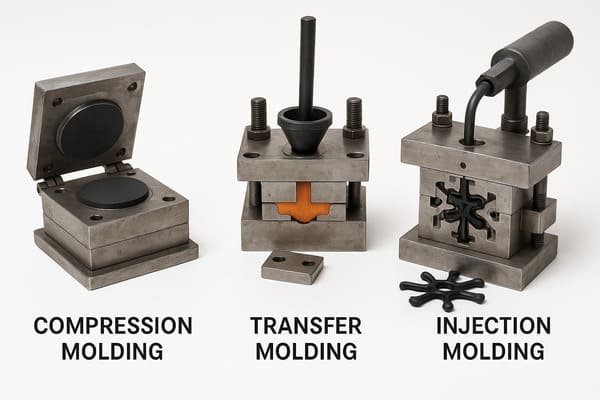
The three main rubber molding processes are compression molding, transfer molding, and injection molding. Each has its own advantages for certain part types and volumes.

Types of Rubber Molding Table
| Molding Type | How It Works | Best For |
|---|---|---|
| Compression Molding | Rubber placed in open mold, compressed and heated | Simple, thick, low-volume parts |
| Transfer Molding | Rubber placed in chamber, forced into closed mold | Medium complexity, with inserts |
| Injection Molding | Rubber injected into closed mold under pressure | High volume, complex shapes |
- Compression molding5 is great for O-rings and thick seals.
- Transfer molding6 allows for metal inserts or more intricate shapes.
- Injection molding7 is used for high-precision, mass production.
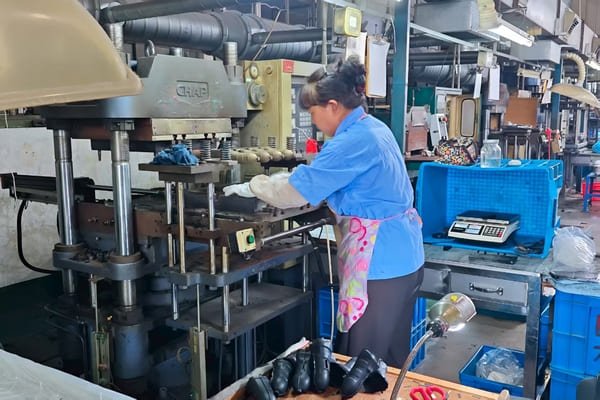
My team uses all three methods depending on customer needs—sometimes even making test samples in one process and switching to another for large production.
How do you ensure quality and accuracy in rubber molding?
Quality problems can show up at any stage. I’ve learned that careful control and inspection at every step pays off in fewer rejects and better part performance.
Quality in rubber molding is ensured through accurate mold design, controlled processing parameters, in-process checks, and final inspection for dimensions, hardness, and defects.

Rubber Molding Quality Checklist
- Mold design and maintenance8
- Exact material measurement
- Temperature and pressure monitoring
- Cure time control9
- Visual inspection (surface finish, flash)
- Dimensional checks (calipers, gauges)10
- Hardness and mechanical testing (Shore A, tensile)11
At Julong Rubber, we test samples from every batch and keep strict records, especially for demanding customers in automotive and HVAC industries.
What are the post-molding processes for rubber parts?
Rubber parts often need finishing steps after molding. Neglecting these can result in assembly problems or customer complaints.
Common post-molding processes include trimming (removing excess flash), surface treatments, painting or coating, vulcanization post-cure, and sometimes assembly with inserts or hardware.
Post-Processing Steps Table
| Process | Purpose |
|---|---|
| Trimming3 | Remove excess flash or sprues |
| Cleaning | Remove mold release, dust, residue |
| Post-cure Bake | Complete vulcanization12, improve properties |
| Surface Finish | Apply coatings, flocking, or painting |
| Assembly | Add metal/plastic inserts, glue, etc. |
Some of my clients request special marking or testing, especially for certified or export products. We are always ready to accommodate these requests.
How do you choose the right rubber and process for your parts?
Choosing the wrong rubber or process can lead to failure in the field. I help customers match their real-world needs to the best solution.
Choosing the right rubber and molding process depends on temperature, chemical exposure, hardness, volume, tolerance, and certification requirements. Early consultation with your supplier saves time and cost.
Decision Table for Process and Material
| Requirement | Best Process | Best Rubber Types |
|---|---|---|
| High volume, tight tolerance | Injection | EPDM, NBR, FKM, Silicone |
| Thick, simple part | Compression | EPDM, NR, SBR |
| Inserts/complexity | Transfer | NBR, CR, FKM, Silicone |
| Food/water contact | All (certified) | Silicone, EPDM, NBR |
I review every project detail with my clients—application, environment, cost—to ensure the final parts perform exactly as needed.
Conclusion
The process of rubber molding combines careful material prep, precise mold design, and controlled curing to produce flexible, reliable parts. Knowing the steps and options helps you get the right product for every application.
-
Explore this resource to understand the critical chemical processes that enhance rubber's durability and performance. ↩
-
Understanding the demolding process is crucial for ensuring quality and efficiency in rubber manufacturing. ↩
-
Explore this resource to learn effective techniques for trimming and finishing rubber parts, ensuring quality and performance. ↩ ↩
-
Explore this link to understand the various rubber molding processes and their specific applications. ↩
-
Learn about compression molding, its advantages, and best applications for rubber parts. ↩
-
Discover the intricacies of transfer molding and its benefits for complex rubber shapes. ↩
-
Find out how injection molding is used for high-precision rubber parts and its advantages. ↩
-
Explore this resource to learn essential mold design and maintenance practices that ensure quality and efficiency in rubber molding. ↩
-
Understanding cure time control is crucial for ensuring optimal rubber properties and minimizing defects in molded parts. ↩
-
Explore this resource to enhance your understanding of precision measurement techniques crucial for quality control in rubber molding. ↩
-
Understanding Shore A hardness testing is crucial for ensuring rubber parts meet performance standards and customer specifications. ↩
-
Learn about vulcanization and its critical role in enhancing rubber properties. ↩


